
Kōpekapeka Hat: Simple, Quick Knit for Mindful Makers
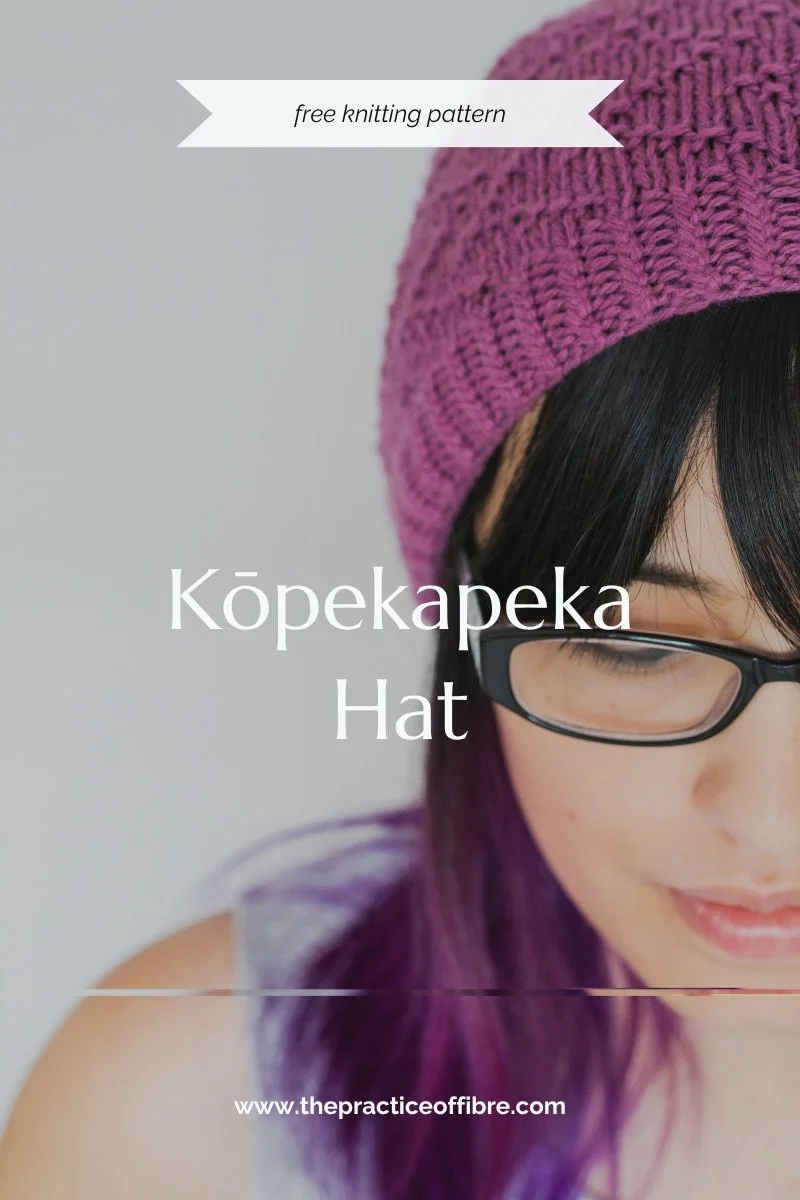
Who says that fun and rewarding projects need to be needlessly complicated? Rich in texture, a snug fit, and a simple, quick knit, the Kōpekapeka hat makes a great project for the upcoming autumn season. Kōpekapeka is Māori for “zig-zag”, named after the zig-zag textured motif featured throughout the body of the hat. Using only a series of knit and purl stitches, beginner knitters can complete their first hat in a few days (while learning an advanced decrease technique!), while more seasoned crafters can enjoy the satisfaction of a quick project. Pair it with a rich colour and yarn that really allows the purl stitches to stand out (high twist yarns are recommended), and you’ll have a delightfully simple hat to add to your everyday handmade wardrobe.
Navigation
Jump to: Pattern Information | Pattern Instructions |
Stitch Patterns & Charts | Techniques & Tutorials
Click or tap the orange arrow to jump back to the top of the page.


Pattern Information
Needle
US size 7 (4.5mm) 16” (32cm) circular needle and size 7 DPNs.
Yarns Used
mYAK yarns Tibetan Cashmere Worsted
(Worsted / 10 ply ; 100% Cashmere goat ; 125 yards / 50 grams).
1 skein in Madder.
Yardage
125 - 200 yards. One skein can be used for this project but it is very gauge-dependent. If you are a loose knitter, 2 skeins will be required for this project.
Gauge
20 sts and 32 rows = 4” / 10cm after blocking.
Other Notions
Stitch markers
Darning needle
Final Measurements
Measurements taken after blocking.
Abbreviations
K - knit
P – purl
K tbl – knit through the back loop
Cdd - centered double decrease: slip 2 sts as if to k2tog, k1, pass the 2 slipped sts over
CO - cast on
Rnd(s) - round(s)
St(s) - stitch(es)
Pattern Instructions
Casting On
CO 100 sts, place marker and join in the rnd, being careful not to twist. Work in twisted ribbing *k1 tbl, p1* for 1 inch (2.5cm). Note: if joining in the rnd right after CO is too tight or difficult, work one row flat, and then join in the rnd on the second row.
Section 1
Knit one rnd, then work textured stitch rnds [1-10] three times. Next, work the decrease rnds [1-26], switching to DPNs when needed. Take darning needle, weave in stitches and tighten to close the crown.
Block hat to measurements, and once it’s dry, enjoy wearing it!
Note: When working the first CDD stitch on the decrease rnd, remove the stitch marker for the beginning of the rnd, slip the last stitch worked on the previous rnd back onto the left needle, and place the stitch marker back on the right needle (it will be after the slipped stitch). Then you can work the CDD decrease.
Finishing
Stitch Patterns & Charts
TEXTURED STITCH (5 sts)
Note: stitch pattern is repeated 20 times per rnd. Use stitch markers to mark repeats if needed.

Rnd 1: P1, k4. (5 sts)
Rnd 2: K1, p1, k3.
Rnd 3: K2, p1, k2.
Rnd 4: K3, p1, k1.
Rnd 5: K4, p1.
Rnd 6: P1, k4.
Rnd 7: K4, p1.
Rnd 8: K3, p1, k1.
Rnd 9: K2, p1, k2.
Rnd 10: K1, p1, k3.
DECREASE RNDS
Note: stitch pattern is repeated 5 times per rnd. Use stitch markers to mark repeats if needed.

Rnd 1: Cdd (see note in section 1), k3, (p1, k4) x 2, p1, k3. (18 sts)
Rnd 2: K5, (p1, k4) x 2, p1, k2.
Rnd 3: K6, (p1, k4) x 2, p1, k1.
Rnd 4: Cdd, (p1, k4) x 3. (16 sts)
Rnd 5: K2, (p1, k4) x 2, p1, k3.
Rnd 6: K3, (p1, k4) x 2, p1, k2.
Rnd 7: Cdd, (p1, k4) x 2, p1, k2. (14 sts)
Rnd 8: K5, p1, k4, p1, k3.
Rnd 9: (K4, p1) x 2, k4.
Rnd 10: Cdd, k1, (p1, k4) x 2. (12 sts)
Rnd 11: K1, p1, k4, p1, k5.
Rnd 12: K2, (p1, k4) x 2.
Rnd 13: Cdd, k1, p1, k4, p1, k2. (10 sts)
Rnd 14: K3, p1, k4, p1, k1.
Rnd 15: (K4, p1) x 2.
Rnd 16: Cdd, k3, p1, k2, p1. (8 sts)
Rnd 17: K3, p1, k2, p1, k1.
Rnd 18: (K2, p1) x 2, k2.
Rnd 19: Cdd, k2, p1, k2. (6 sts)
Rnd 20: K4, p1, k1.
Rnd 21: K5, p1.
Rnd 22: Cdd, k2, p1. (4 sts)
Rnd 23: K2, p1, k1.
Rnd 24: K1, p1, k2.
Rnd 25: Cdd, k1. (2 sts)
Rnd 26: Knit all sts
Thank you!
If you enjoyed knitting this pattern, please consider leaving me a tip!